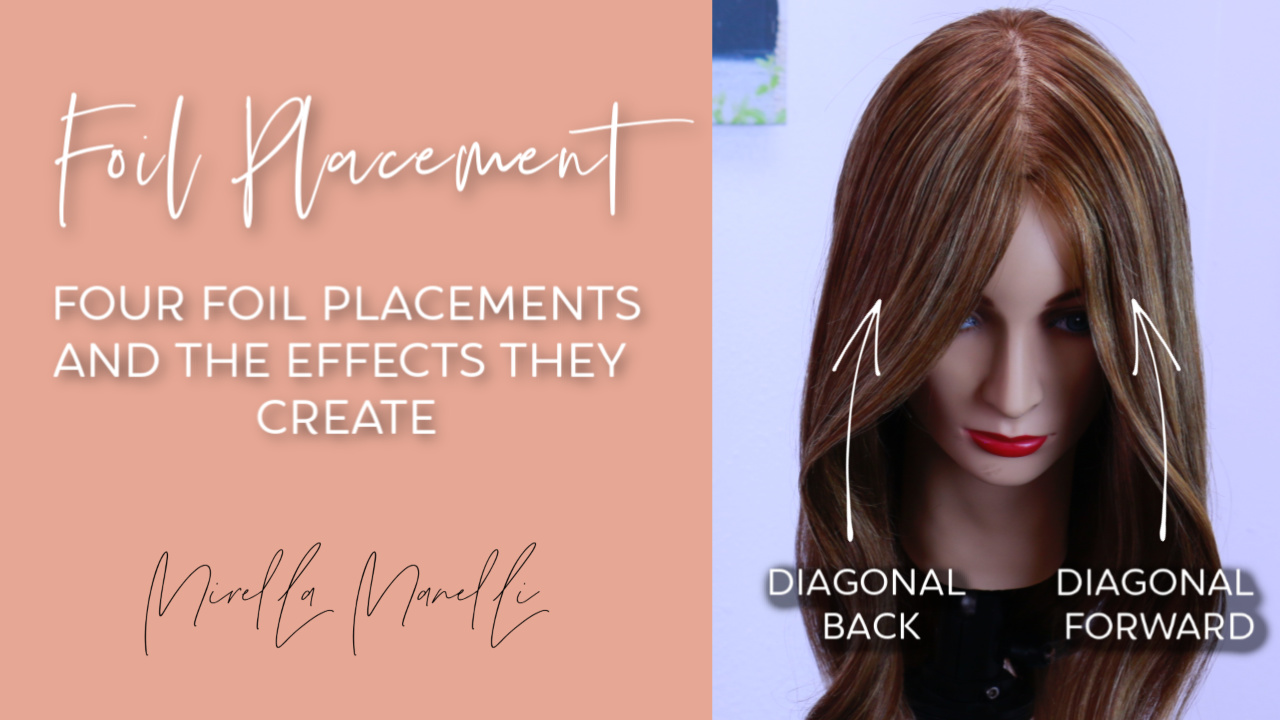

We all know I love invisible hybrid hair weft hair extensions. In this video tutorial, watch how I transform fine hair into long thick waves!
We all know I love invisible hybrid hair weft hair extensions. I especially love when they can transform fine, thin hair into long thick tresses. Oh, and we can’t forget about the Kera-link combo! It’s too good to resist.
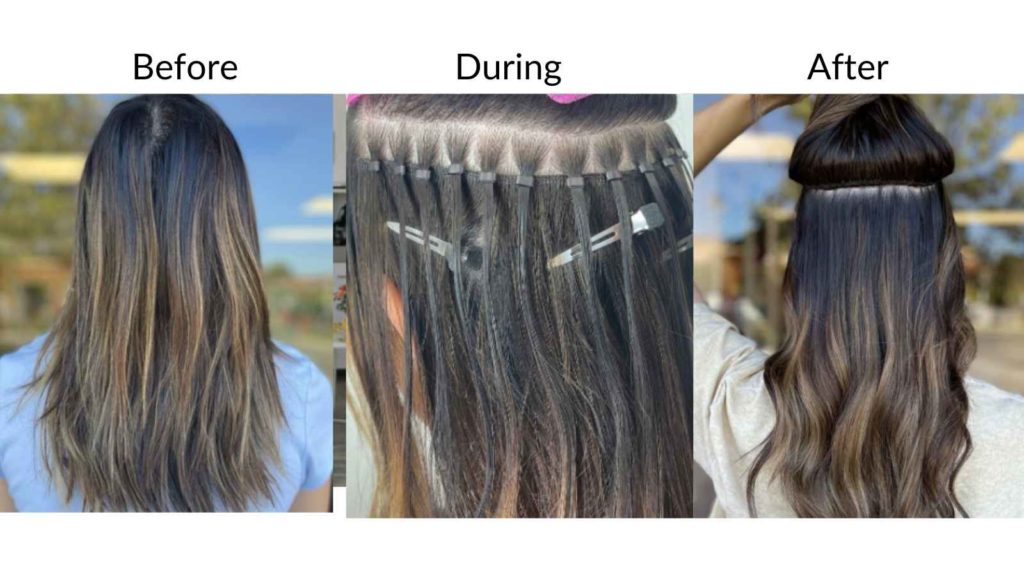
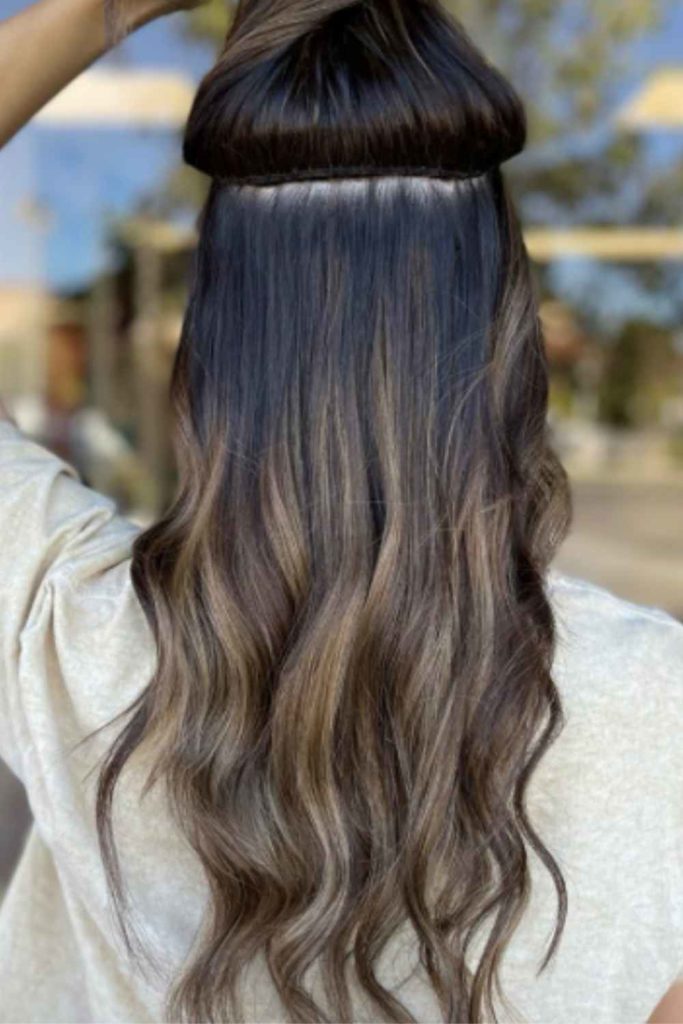
Installing Hybrid Weft Extensions
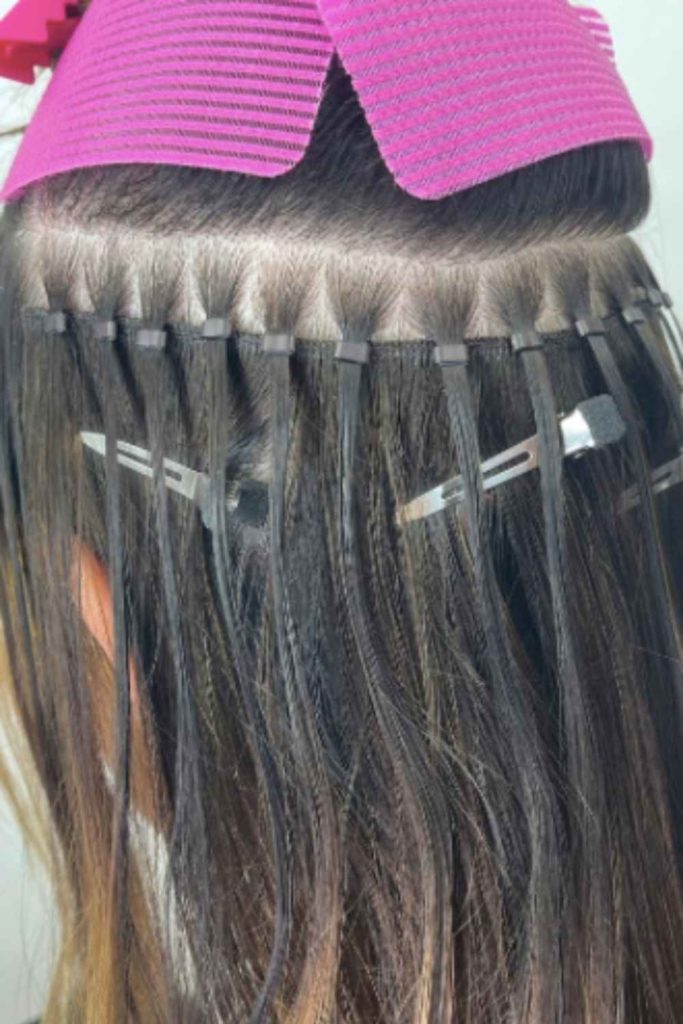
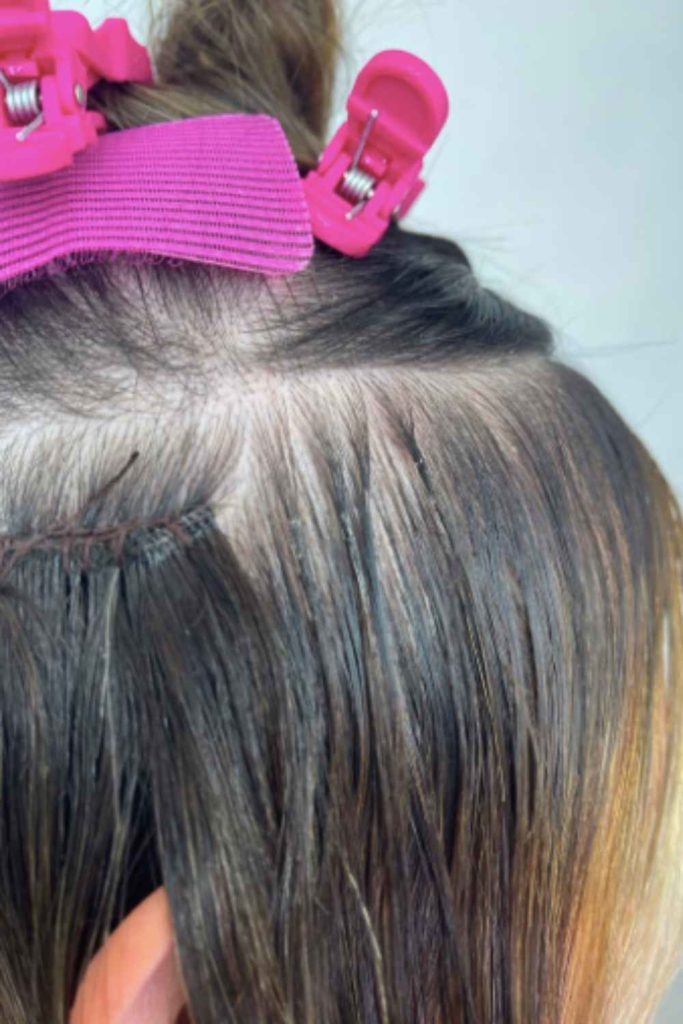
My client has very fine hair. To accommodate that factor, I like to start with at least 3 fingers width away from the hairline. If you are having trouble determining whether you need 2 or 3 fingers, take a rat tail comb and place the hair over it. If you can see the tail comb, you can see the extensions.
First, when deciding how much hair is in the bead, always take a slightly bigger section than the bead. A good way to measure is you want the same depth as the bead but a slightly bigger width.
The goal is to have your beads flat against the head. No beveling here! Then, make sure to take your Luxe tool at a zero-degree elevation when you clamp the bead. If the luxe tool is not at zero-degree elevation, it will bevel out and it can make the weft pop out, or it can be uncomfortable to the client. You can easily remove the bead with the luxe tool as demonstrated in the video.
The difference from regular weft installation:
For the invisible hybrid hair extensions, the installation process differs from a regular install. The idea is that you can’t see the beads at all. So, you first flip up the extensions and clip them out of the way. I find that placing one weft underneath the beads is the easiest way to go.
Once you secure the weft underneath the beads, you can unclip the beads from up top. You want the weft to be as close to the beads as possible. After, you can take the rest of your extensions and place them on top of the beads. Then, you can start sewing as usual.
I always like to take my thread and needle about 3 beads back to ensure the most amount of security. If for whatever reason the thread slips, it is less likely to fully fall out. Keep in mind with the invisible method, you have a weft underneath so check and make sure to get it in the thread.
While you are on the outer corners of the weft, make sure to do at least a double stitch. Sometimes I even do 3 for maximum security. Sew on the left and right of the bead. Try to stay away from the middle of the bead because you are unable to easily move up the extension in 6-8 weeks. Click here to watch me move up extensions!
To finish off the section, continue the same stitch back about 2-3 beads back for maximum security.
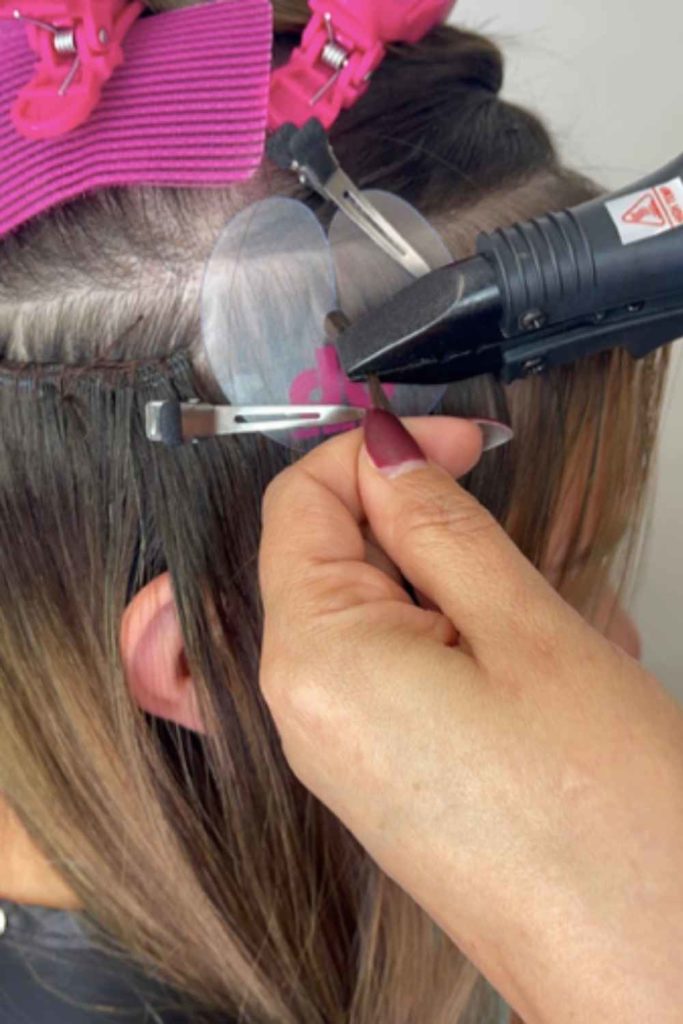
Kera-Links for Fullness
Kera-Links are my favorite way to create fullness around the hairline, especially for baby fine hair. Whats nice about the Kera-Links is you are able to cut them up into small pieces that look undetectable on the hairline. The finer you cut the extensions, the more invisible they become.
You want to make sure you take the same width and depth as the extension. Make sure you take the protective disc and put it against the scalp, because if you go to close then you may burn your client.
Once the keratin is hot, wait a few seconds and then roll the keratin to make the extension seamless. If the keratin is still thick, reheat it and re-roll the extension. Go back to back on the extensions for maximum fullness. If you don’t, it can look too thin.
It is also recommended to get multiple colors with the extensions for the most natural look. To watch a full installation for Kera-Links, click here.
How to move up Invisible Weft Extensions
The easiest way to move up Invisible weft extensions is to fully remove the weft. Just take your stork shears and cut away the thread and easily pull the weft out. You can then take your Luxe Tool and move up the beads.
Once the beads are secure, you can re-sew the weft in and you are brand new. If you did not do the invisible method, you can easily flip the weft up and move up the beads.
Tools you need for Hybrid Weft Extensions
–Hair Grippers – Ideal to have to keep your sections clean and reduce flyaways.
-Luxe Tool – This is the clamp that makes the beads stay in place.
-Metal clips – These tiny clips help keep the wefts in place when sewing.
-Loop Tool – The tool used to load your silicon beads
-Quick Pick – This tool is used to create clean sectioning for your bead.
-Hooked Needle – These curved needles creates an easy way to sew your extension.
-Silicon Beads – You must use silicon beads to prevent slippage as much as possible. If you use other types of beads it may slip.
-Donna Bella Boar Bristle Brush – This brush is great for getting in between the beads to comb out all of the knots and get rid of dirt and debris
3 Types of Weft Extensions
Hand Tied wefts- The hand-tied wefts are super lightweight but must be bonded with glue at the tips. Once you cut the hand-tied wefts, the hair needs to be bonded otherwise the weft will unravel. Ideal for clients with fine hair.
Hybrid Wefts – The lightness of a hand-tied and the sturdiness of a machine-tied weft, the hybrid are the best of both worlds. Once the weft is cut, you do not need to glue it back together. Ideal for all hair types.
Machine Tied Wefts – The heaviest out of all three due to the fact there is more hair in the weft, the machine tied wefts are strong. At the base, the weft can be thick, that is why most people tend to lean toward Hybrid wefts. Ideal for thick hair types.
My favorite types of extensions come from Donna Bella Hair, offering 7 different types of extensions! Use coupon code MIRELLA to save on your purchase. Click here to shop!

In this video tutorial, I show you everything you need to know about Kera Link Hair Extensions using all Donna Bella Hair!
Hair extensions are supposed to be invisible. But we all know how it goes, sometimes they just aren’t! Lets face it, bulky tape ins or I-Links can be spotted if not taken care of properly. But did you know there is an extensions type that literally is meant to look like your hair, even from the base? Let’s break it down: Kera Link Hair Extensions.