


PHOTOGRAPHER: Denise Silva
BASED IN: Virginia, USA
KNOWN FOR: Creative landscape, wildlife, and travel photography, as well as being a key member of Road Runner Photography Tours
SHOOTS WITH: FUJIFILM X-H1 Camera, X-T2 Camera, FUJINON XF16mmF1.4 R WR Lens, XF56mmF1.2 R Lens, XF18-55mmF2.8-4 R LM OIS Lens, XF50-140mmF2.8 R LM OIS WR Lens, XF55-200mmF3.5-4.8 R LM OIS Lens, XF100-400mmF4.5-5.6 R LM OIS WR Lens
As photographers, we are always looking for different ways to express ourselves and share our vision of the world around us. A great way to do this is with longer exposures – capturing the passage of time while the shutter is open, rather than freezing it with a short shutter speed. By using longer exposures to enhance our images, we can allow the viewer to experience the circumstances under which the image was originally created.
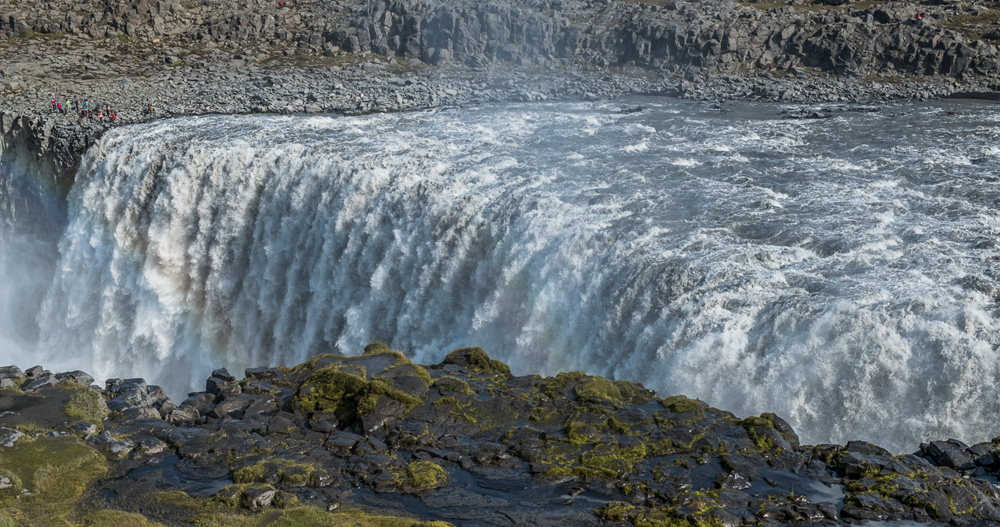
Let’s look at an example. For this image of Dettifoss in North Iceland, I fired off a shot to capture the rainbow just before it faded; the fast 1/750 sec shutter speed has frozen the water in free fall. Although there is a sense of volume, there is little sense of motion, so I set up another shot using a long exposure of 1.4 secs to blur the movement of water as it cascaded over the falls. This image demonstrates not only the volume of water, but is also a better representation of how I experienced this scene.
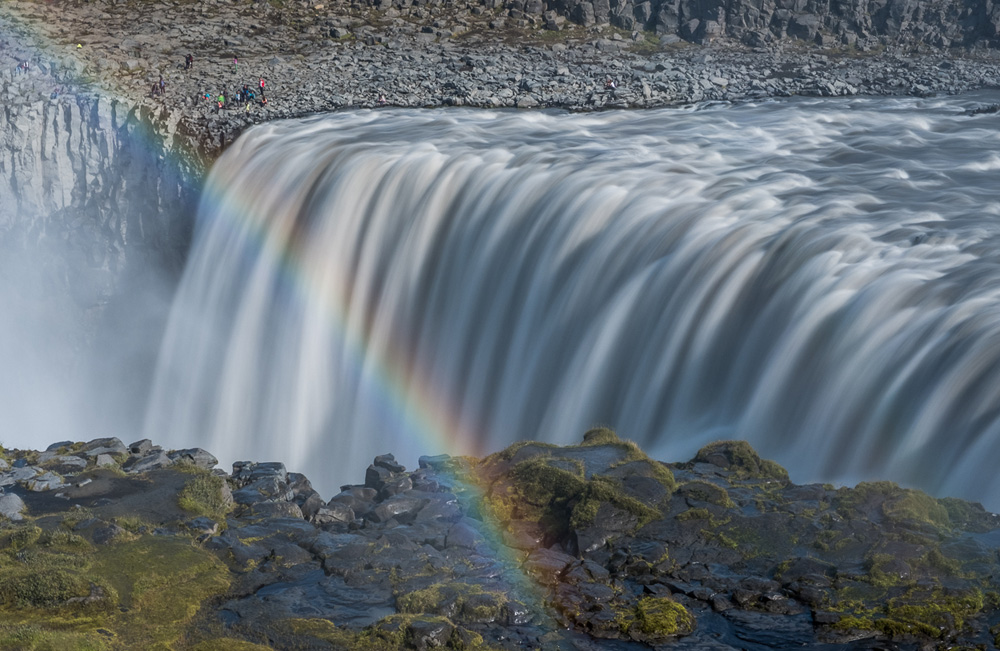
This is just one way in which using a slower exposure can transform your photography. Long shutter speeds can be used at any time of day and in virtually any kind of weather to achieve different effects. In my Dettifoss example they allow the motion of your subject to be recorded.
Let’s explore some techniques.
Tripod-Based Long Exposure Photography
With the right equipment, long exposures can be created at any time of day. When light levels are low – at night, in the early morning or in the evening – putting your camera on a tripod and shooting at low ISO values and mid-range apertures might be all you need to do. During the middle of the day, however, you’ll need to reach for some filters to reduce the amount of light entering the lens. Here’s a list of the tools you’ll need:
- Sturdy tripod
- Remote shutter release/smartphone/self-timer
- Filters
Although each long exposure photo is unique, many of the camera settings you’ll need to use are the same. These include:
- An exposure mode that lets you achieve long shutter speeds (M, B, or T)
- Electronic front curtain shutter (if available)
- The ability to set a low ISO value
- The ability to disable long exposure noise reduction
While most cameras are capable of shooting long exposure images, some are not as easy to set up as others. Thankfully, the traditional manual controls on X Series cameras make it easy to configure them for manual shooting – a good move when working with long exposures.
In order to prevent static subjects from blurring due to camera shake, it’s important to put your camera on a sturdy tripod to keep it still. If your tripod is wobbly, unbalanced or on a shaky surface it will be difficult to sustain a long exposure without blur. You’ll also need a way of triggering the camera without accidentally moving it – pressing the shutter release button is not going to do it. My preferred way is to use a remote release – the wired kind, as I find them to be more reliable. You can also use the FUJIFILM Camera Remote app to start the exposure remotely.

If neither of these options are available to you, try using your camera’s self-timer to start the exposure. You’ll need to touch the camera’s shutter release button, of course, but by the time the delay has elapsed any vibrations will have died down. The two-second option will be fine, and it allows you to time your shot more accurately than the ten-second delay.
Your X Series camera will be able to time an exposure up to 15 minutes in length: just set the shutter speed or Exposure mode dial to T and use the rear command dial to select a long shutter speed. In B mode, the camera keeps the shutter open for up to 60 minutes, though you’ll need a remote release to avoid image-blurring vibrations.
The key to picking a shutter speed is experimentation, and with experience this will become easier as you learn which kind of duration works best with different moving subjects.
Filtering for Long Exposures
To create a long exposure in the middle of the day, photographers are often tempted to set their camera’s ISO sensitivity to its lowest setting and choose the smallest aperture they can, but this option only provides limited results and won’t work in very brightly lit situations. It’s a much better idea to use a neutral density (ND) filter to reduce the amount of light coming into the camera, allowing very long shutter speeds to blur motion.
ND filters come in different strengths, from the commonly found two- or three-stop variety, to the more exotic six-, ten- and even 15-stop. Choosing which to use depends on how much light you want to block, what time of day you’re shooting, and which shutter speed you want to use. I sometimes use a three- or six-stop ND filter around sunset, and a ten-stop filter in the middle of the day. It’s good to have a selection in your bag.
The biggest challenge with ND filters is that they can impart a color cast to the image, particularly on the longest exposures. Some brands have a magenta cast, some have a cool (blue) cast, some have a warm (yellow) cast, and some have little to no cast. I carry ND filters developed by Breakthrough Photography, in San Francisco, as these filters have no perceivable color cast.
Next Steps
Now that we have discussed the gear necessary to create long exposure images, let’s take a look at your next steps:
- Remember that lower ISO settings result in longer exposures and less noise in the image. Pick an ISO setting that’s as low as possible, preferably your camera’s base setting (ISO 160 or ISO 200).
- When it comes to Exposure modes, long exposure photography is best tackled in Manual (M), Time (T) or Bulb (B) – all of which can be selected using the camera’s shutter speed/aperture dials or the mode dial. In these modes you’ll have complete control over shutter speed, but the exposure values won’t change as light levels fluctuate, so it’s important to regularly assess your exposure.
- Focusing and composition are best tackled without the ND filter in place. A strong ND filter could make it difficult to see what is in front of you. Manual focus mode will let you set the focus and then leave it set to the same distance while you shoot.
- Determining the proper exposure to use is best done without an ND filter attached. Make a note of the indicated shutter speed before lengthening this by the required number of stops. For instance, if you’re shooting at 1/125 sec at F11 and ISO 200 without a filter, just count down ten stops to get the proper exposure for a ten-stop ND filter: eight seconds. There are smartphone apps to help you do this more quickly.
Final Thoughts
Long exposures are another great way to create unique images that tell a different story. They can place the viewer in the moment, where they can experience the sound of waves, the crashing of water falling from great heights, or the wind blowing clouds through the sky.
Why don’t you challenge yourself to tell a long exposure story on your next photography adventure?
Denise Silva is a FUJIFILM-compensated professional photographer.
To see more of Denise’s work, visit her website.
To explore the full X Series lineup visit the Fujifilm Website